> ## Documentation Index
> Fetch the complete documentation index at: https://docs.rooler.ai/llms.txt
> Use this file to discover all available pages before exploring further.
# Quickstart Guide
> Get up and running with Rooler in minutes
## Video Walkthrough
## Getting Started
Welcome to Rooler! This guide will walk you through the initial setup and core workflows.
Rooler uses an invitation-based system. You'll receive an email with:
* Your login credentials
* A temporary password
We strongly recommend changing your temporary password immediately after your first login for security.
If you forget your password later, visit our [Forgot Password](/account/forgot-password) section.
Navigate to [app.rooler.ai](https://app.rooler.ai) and log in with your credentials.
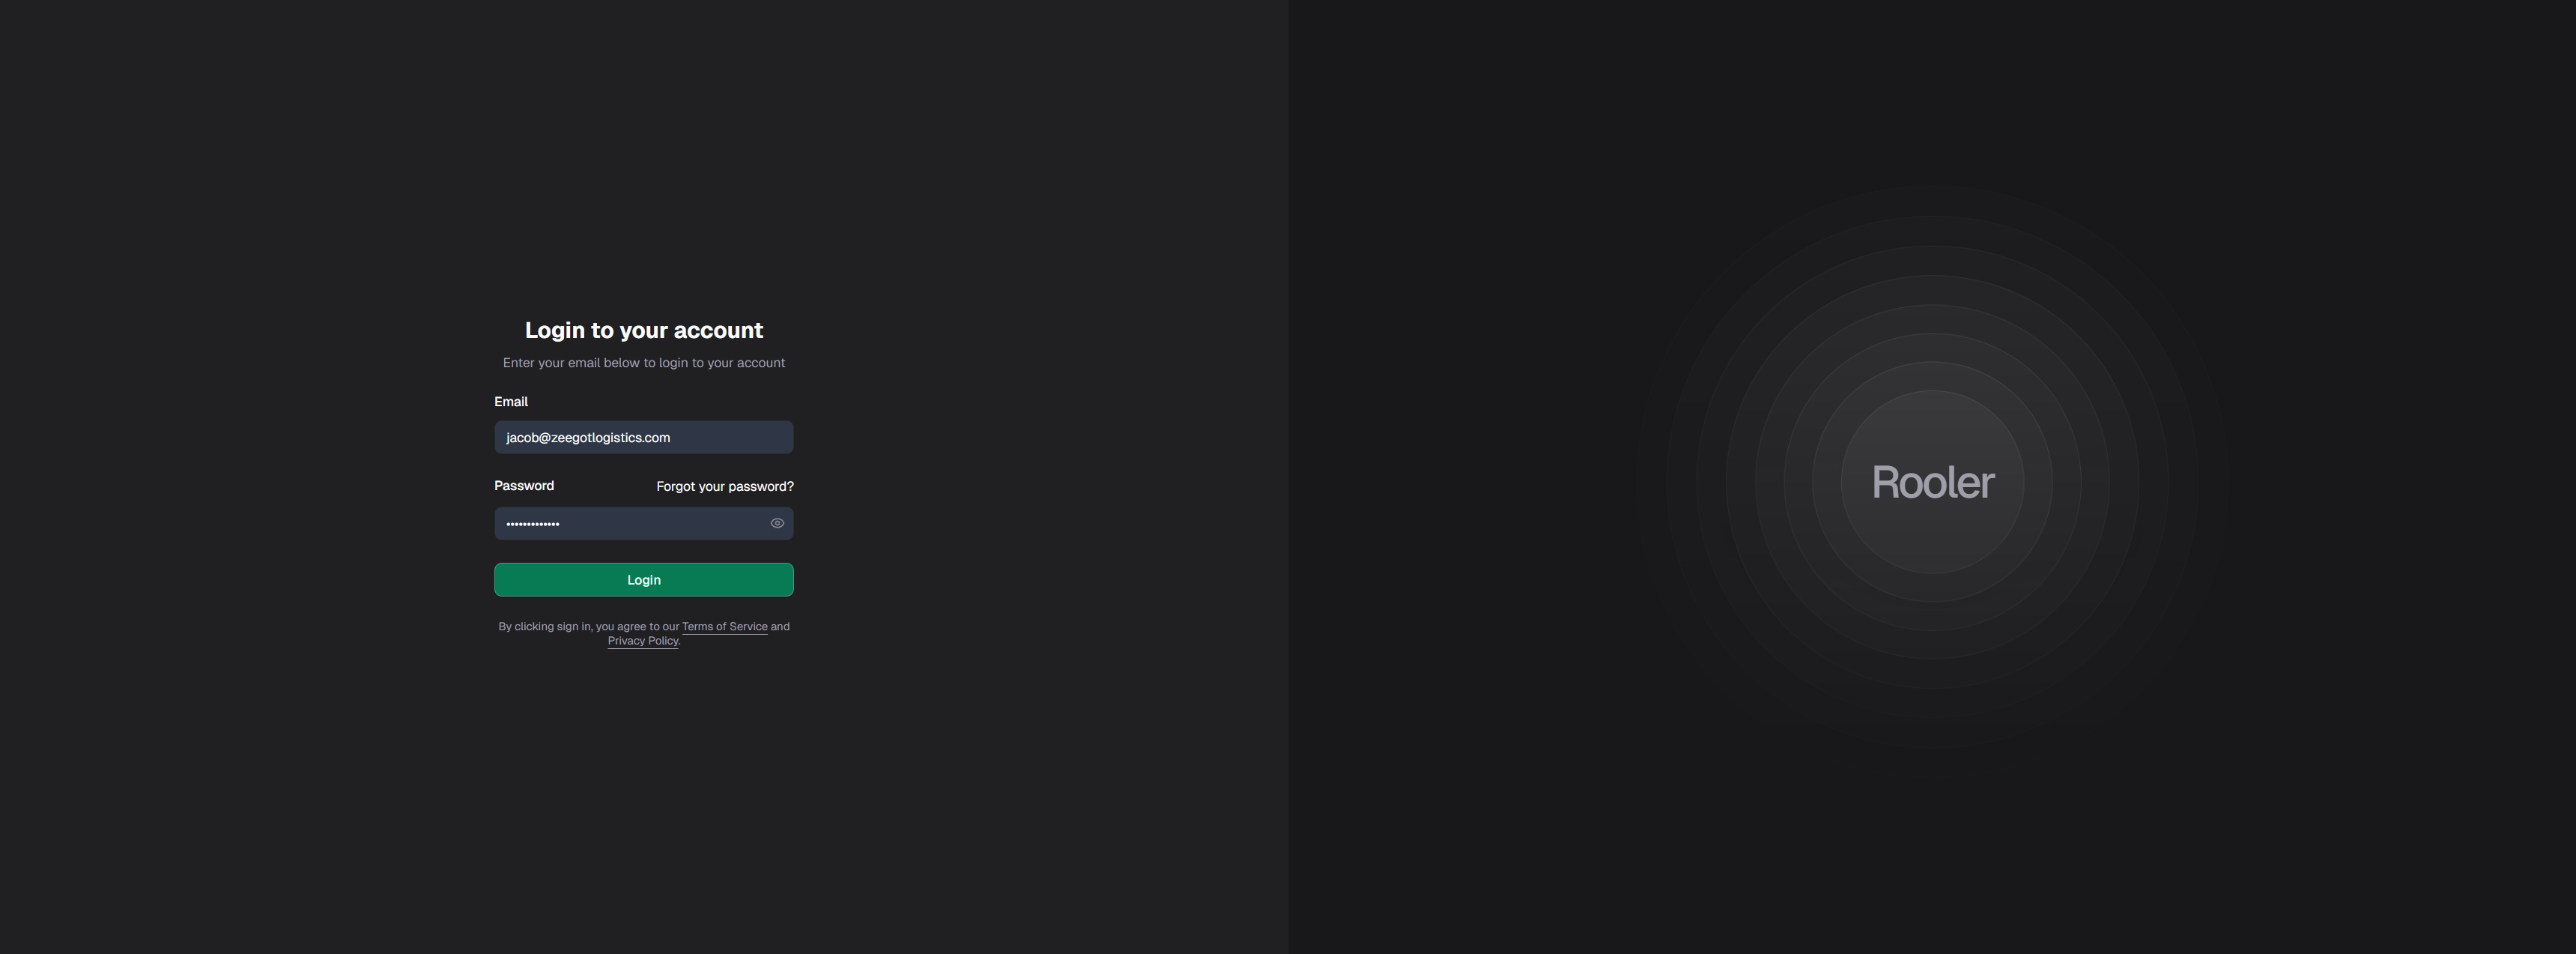 After your first successful login, you'll be prompted to change your temporary password.
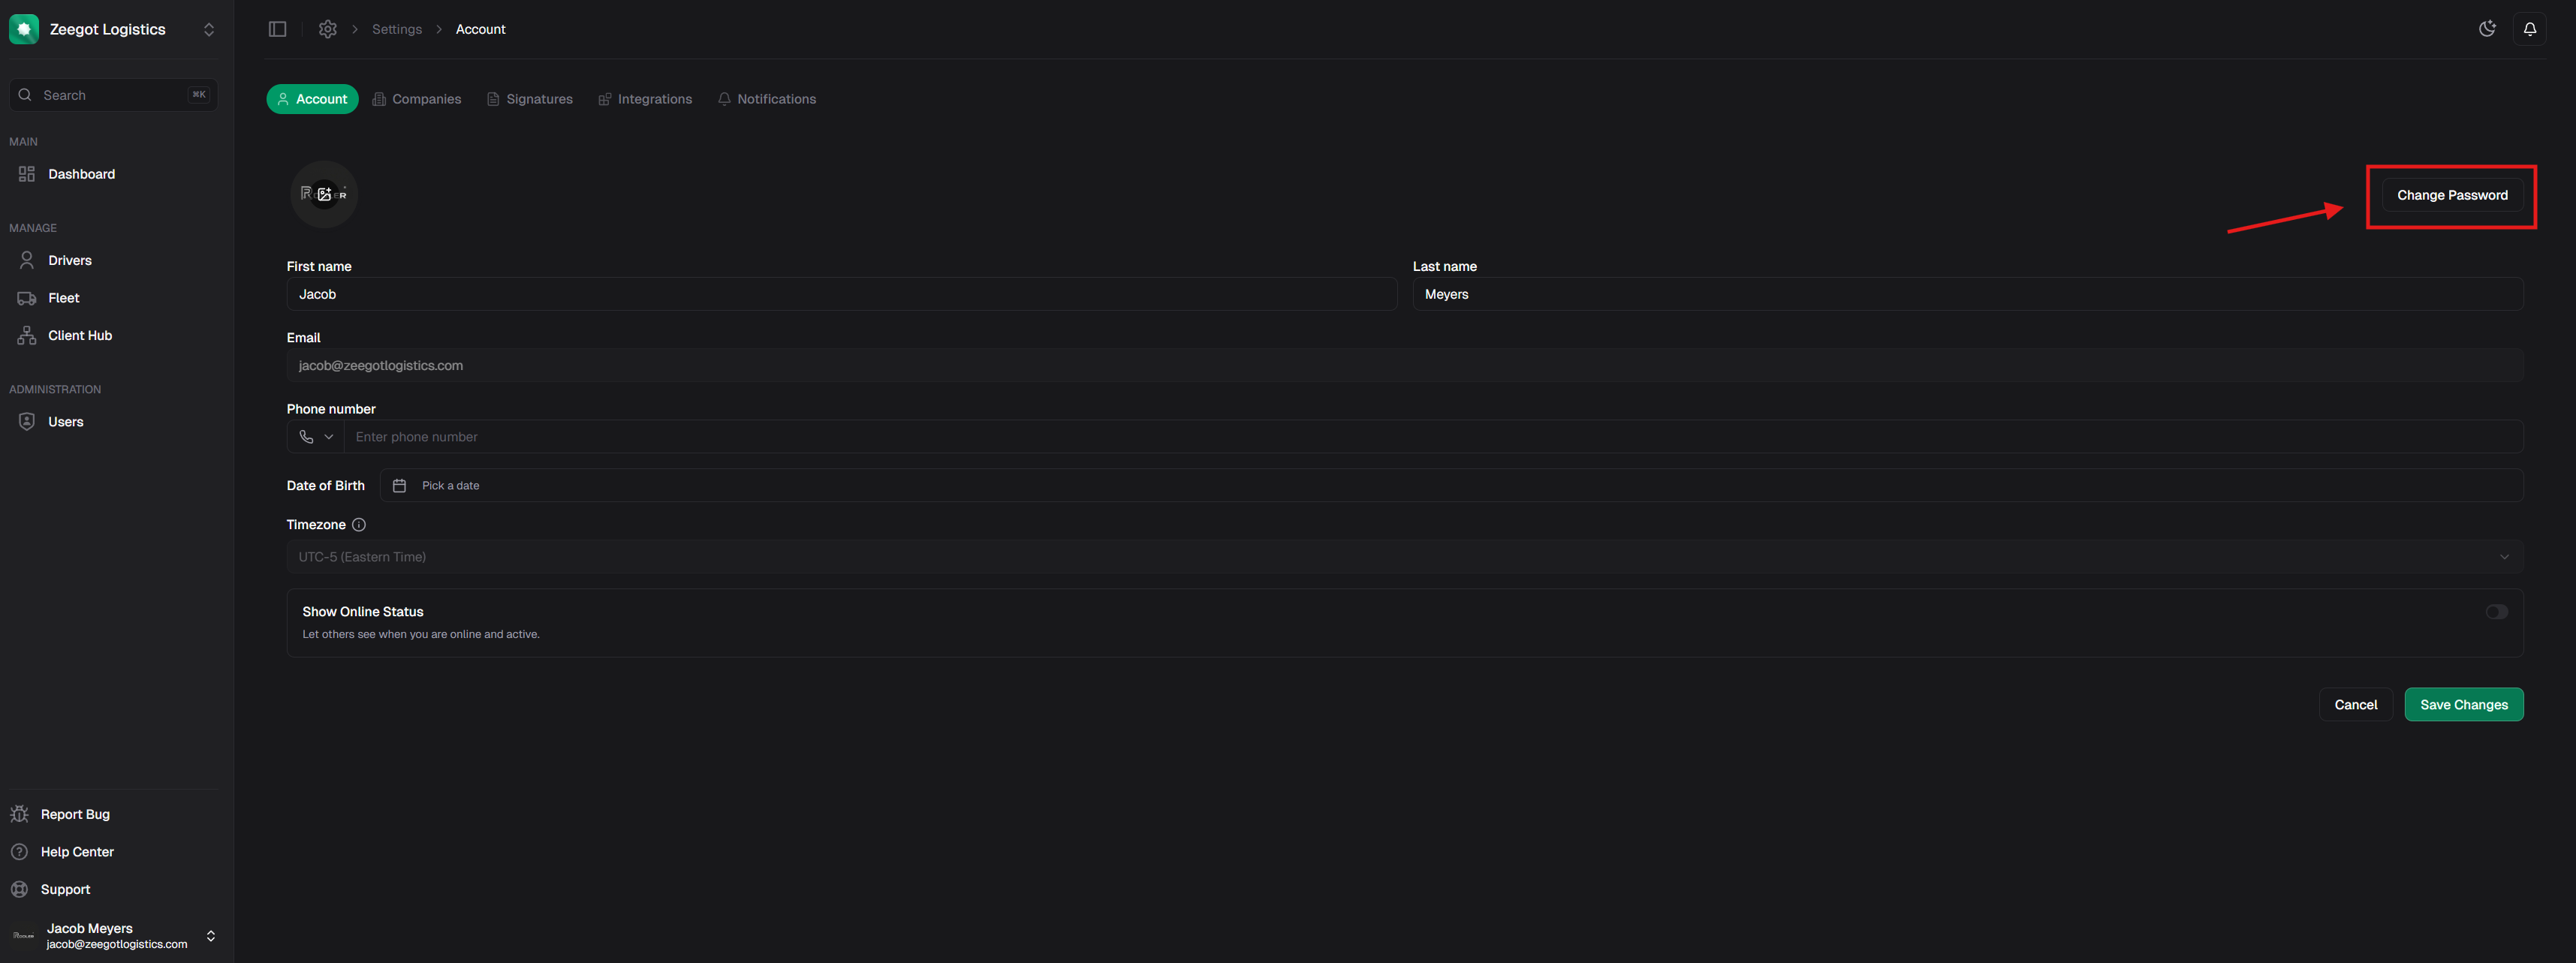 Click the **Change Password** button to open the password change dialog.
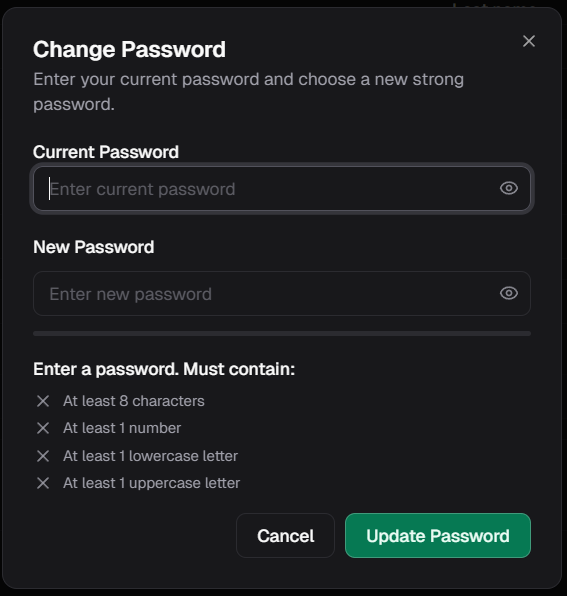 Enter your current password and choose a new strong password that meets the requirements:
* At least 8 characters
* At least 1 number
* At least 1 lowercase letter
* At least 1 uppercase letter
Your organization is set up by the Rooler team, but if you have **Owner** or **Admin** role permissions, you can:
* Create new companies within your organization
* Manage existing companies
* Configure company settings
Learn more in [Company Management](/management/company-management).
Connect your essential tools to Rooler:
* **Email** - Sync your Gmail, Outlook, or other email providers
* **Telegram** - Connect your Telegram account for messaging
* **ELD Systems** - Integrate with Samsara, Motive, or other tracking systems
**Admin/Owner Only:** ELD system integrations can only be managed by users with Admin or Owner roles.
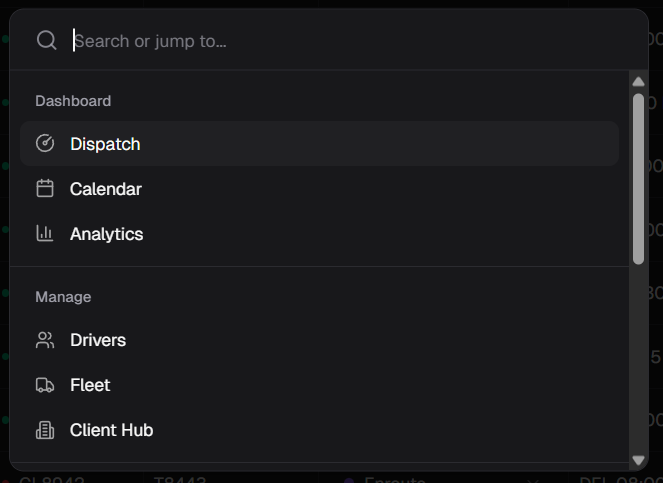
**Quick Access:** Press `Ctrl+K` (or `Cmd+K` on Mac) to open the command palette:
Enter your current password and choose a new strong password that meets the requirements:
* At least 8 characters
* At least 1 number
* At least 1 lowercase letter
* At least 1 uppercase letter
Your organization is set up by the Rooler team, but if you have **Owner** or **Admin** role permissions, you can:
* Create new companies within your organization
* Manage existing companies
* Configure company settings
Learn more in [Company Management](/management/company-management).
Connect your essential tools to Rooler:
* **Email** - Sync your Gmail, Outlook, or other email providers
* **Telegram** - Connect your Telegram account for messaging
* **ELD Systems** - Integrate with Samsara, Motive, or other tracking systems
**Admin/Owner Only:** ELD system integrations can only be managed by users with Admin or Owner roles.
**Quick Access:** Press `Ctrl+K` (or `Cmd+K` on Mac) to open the command palette:
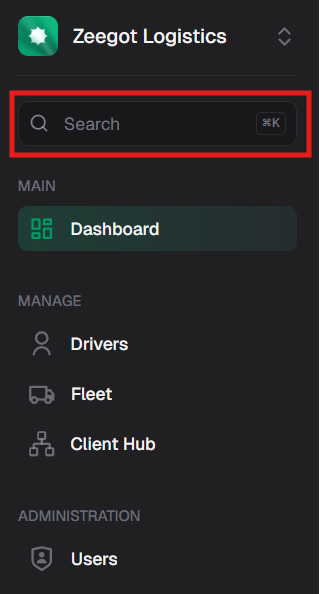 Then type "integrations" to jump directly to the integrations page:
 **Or navigate manually:**
1. Click your user dropdown at the bottom left
**Or navigate manually:**
1. Click your user dropdown at the bottom left
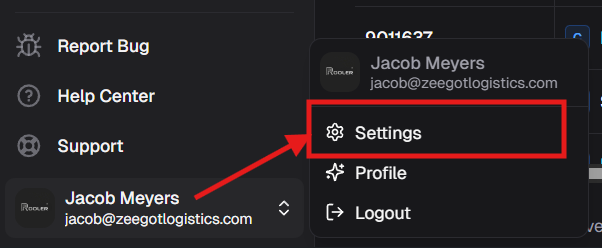
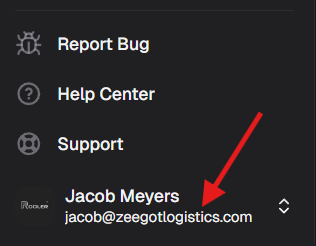 2. Select **Settings**
 3. Click the **Integrations** tab
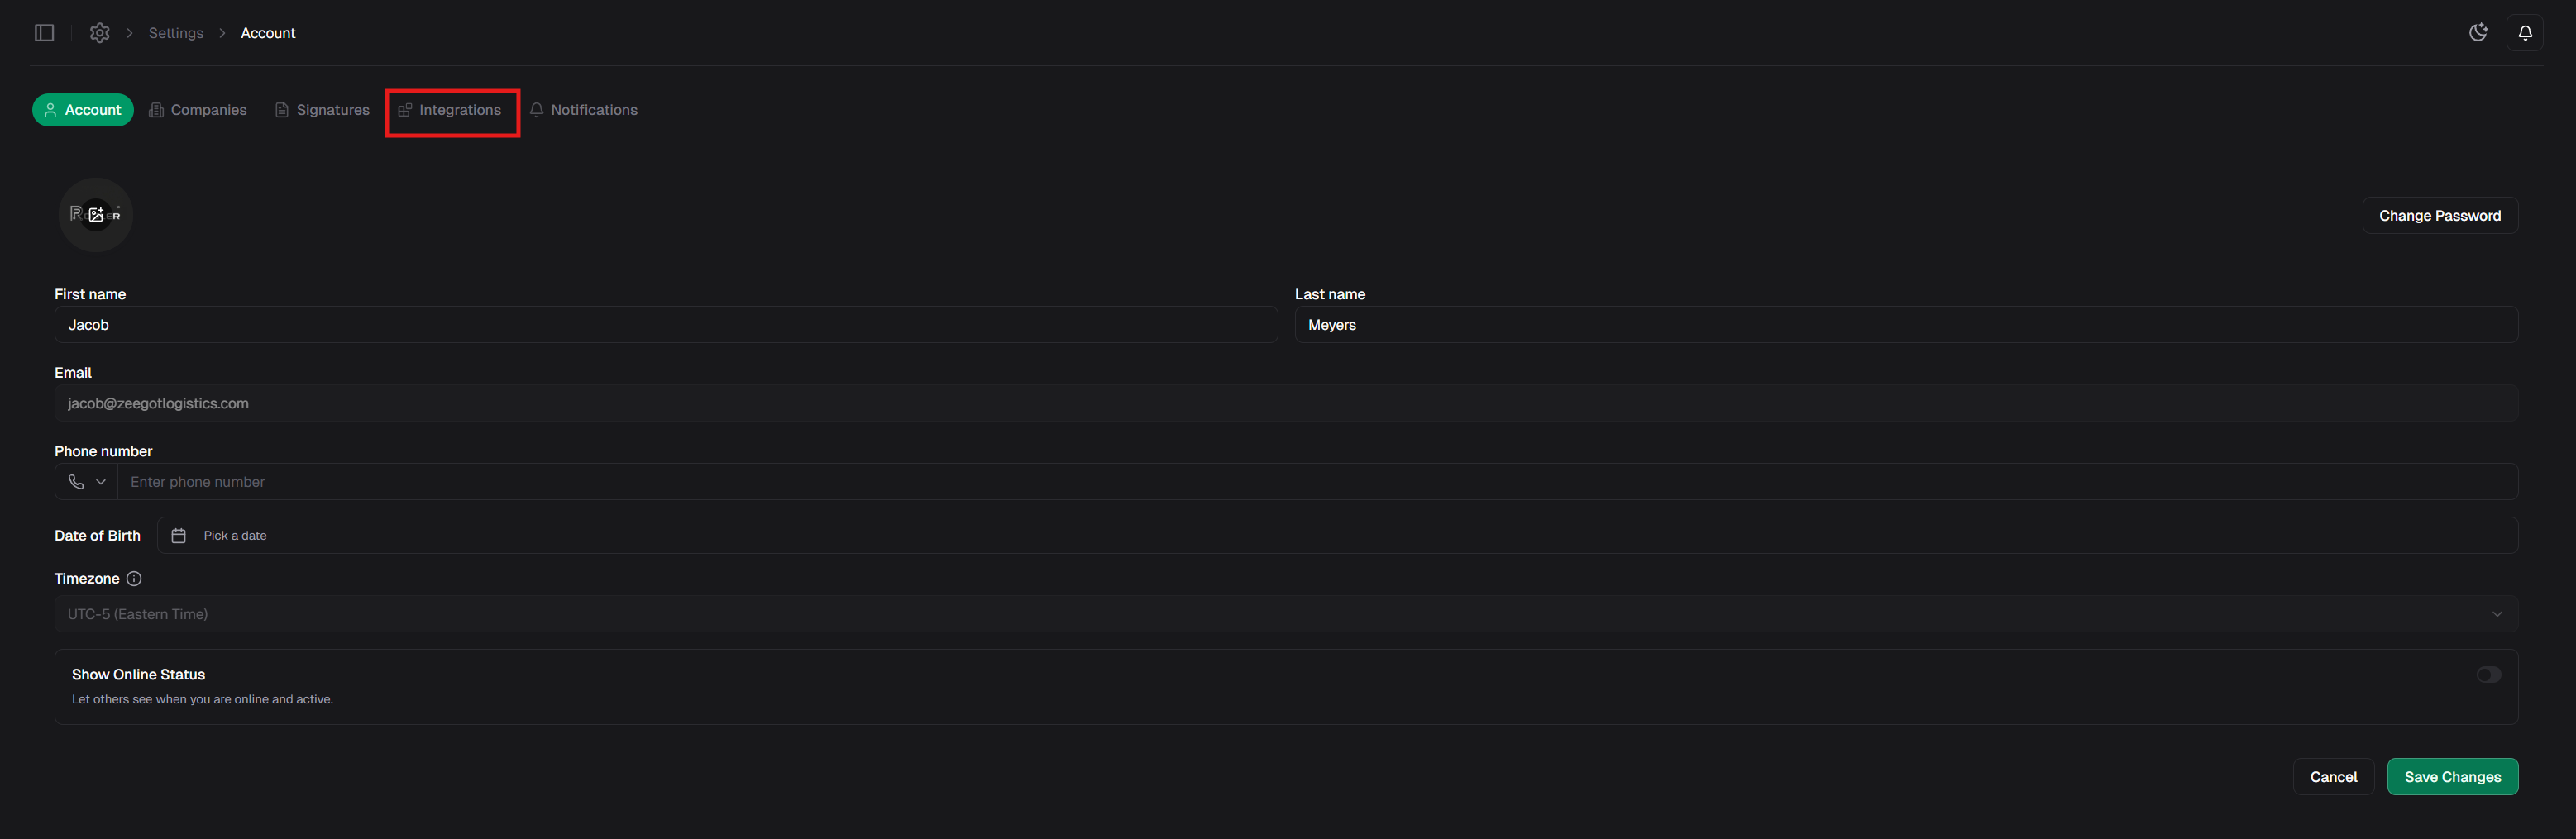 4. Connect your integrations
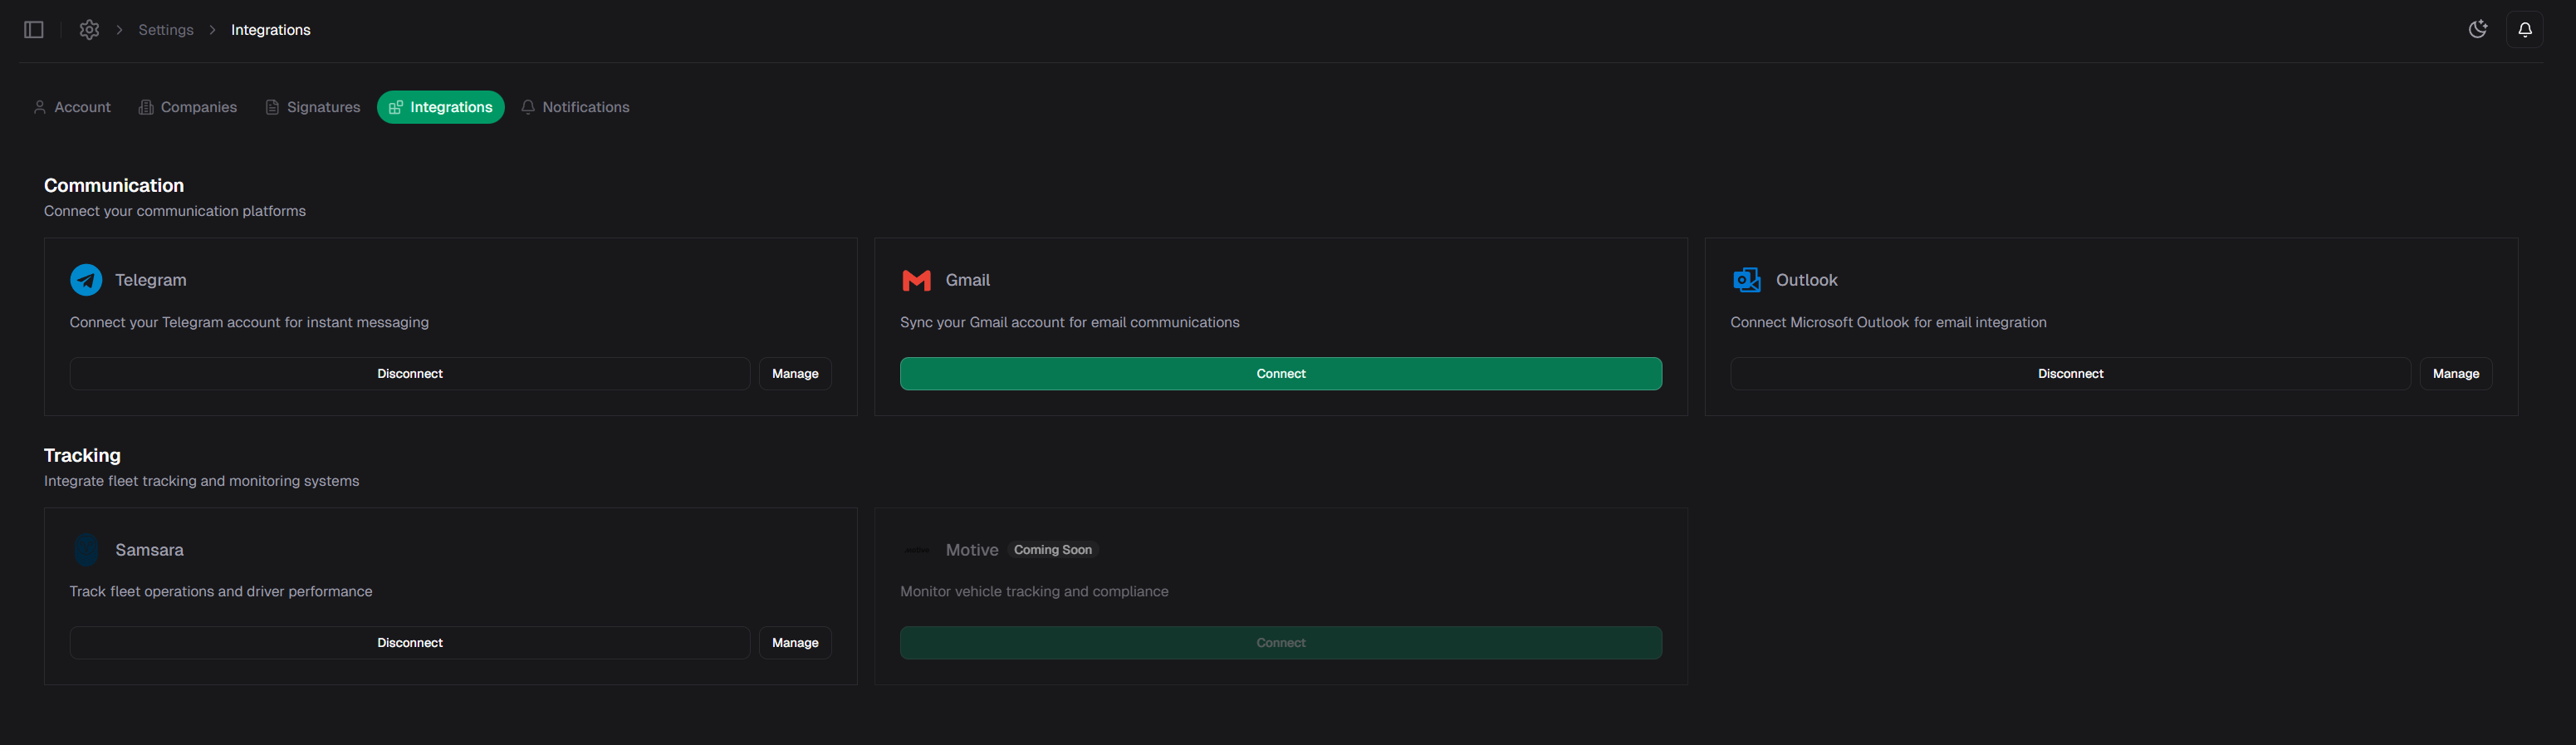 [View Integrations Guide](/integrations/overview)
Group your dashboard by dispatchers to focus on what matters.
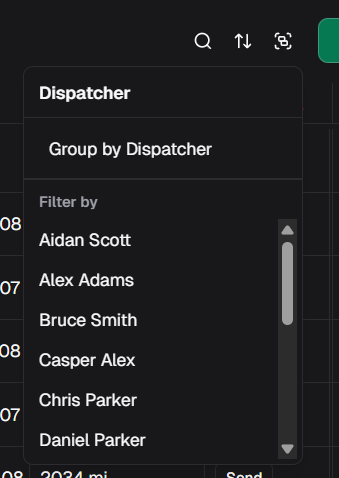
Click the filters/groups icon in the top toolbar:
[View Integrations Guide](/integrations/overview)
Group your dashboard by dispatchers to focus on what matters.
Click the filters/groups icon in the top toolbar:
 Select **Group by Dispatcher** from the dropdown:
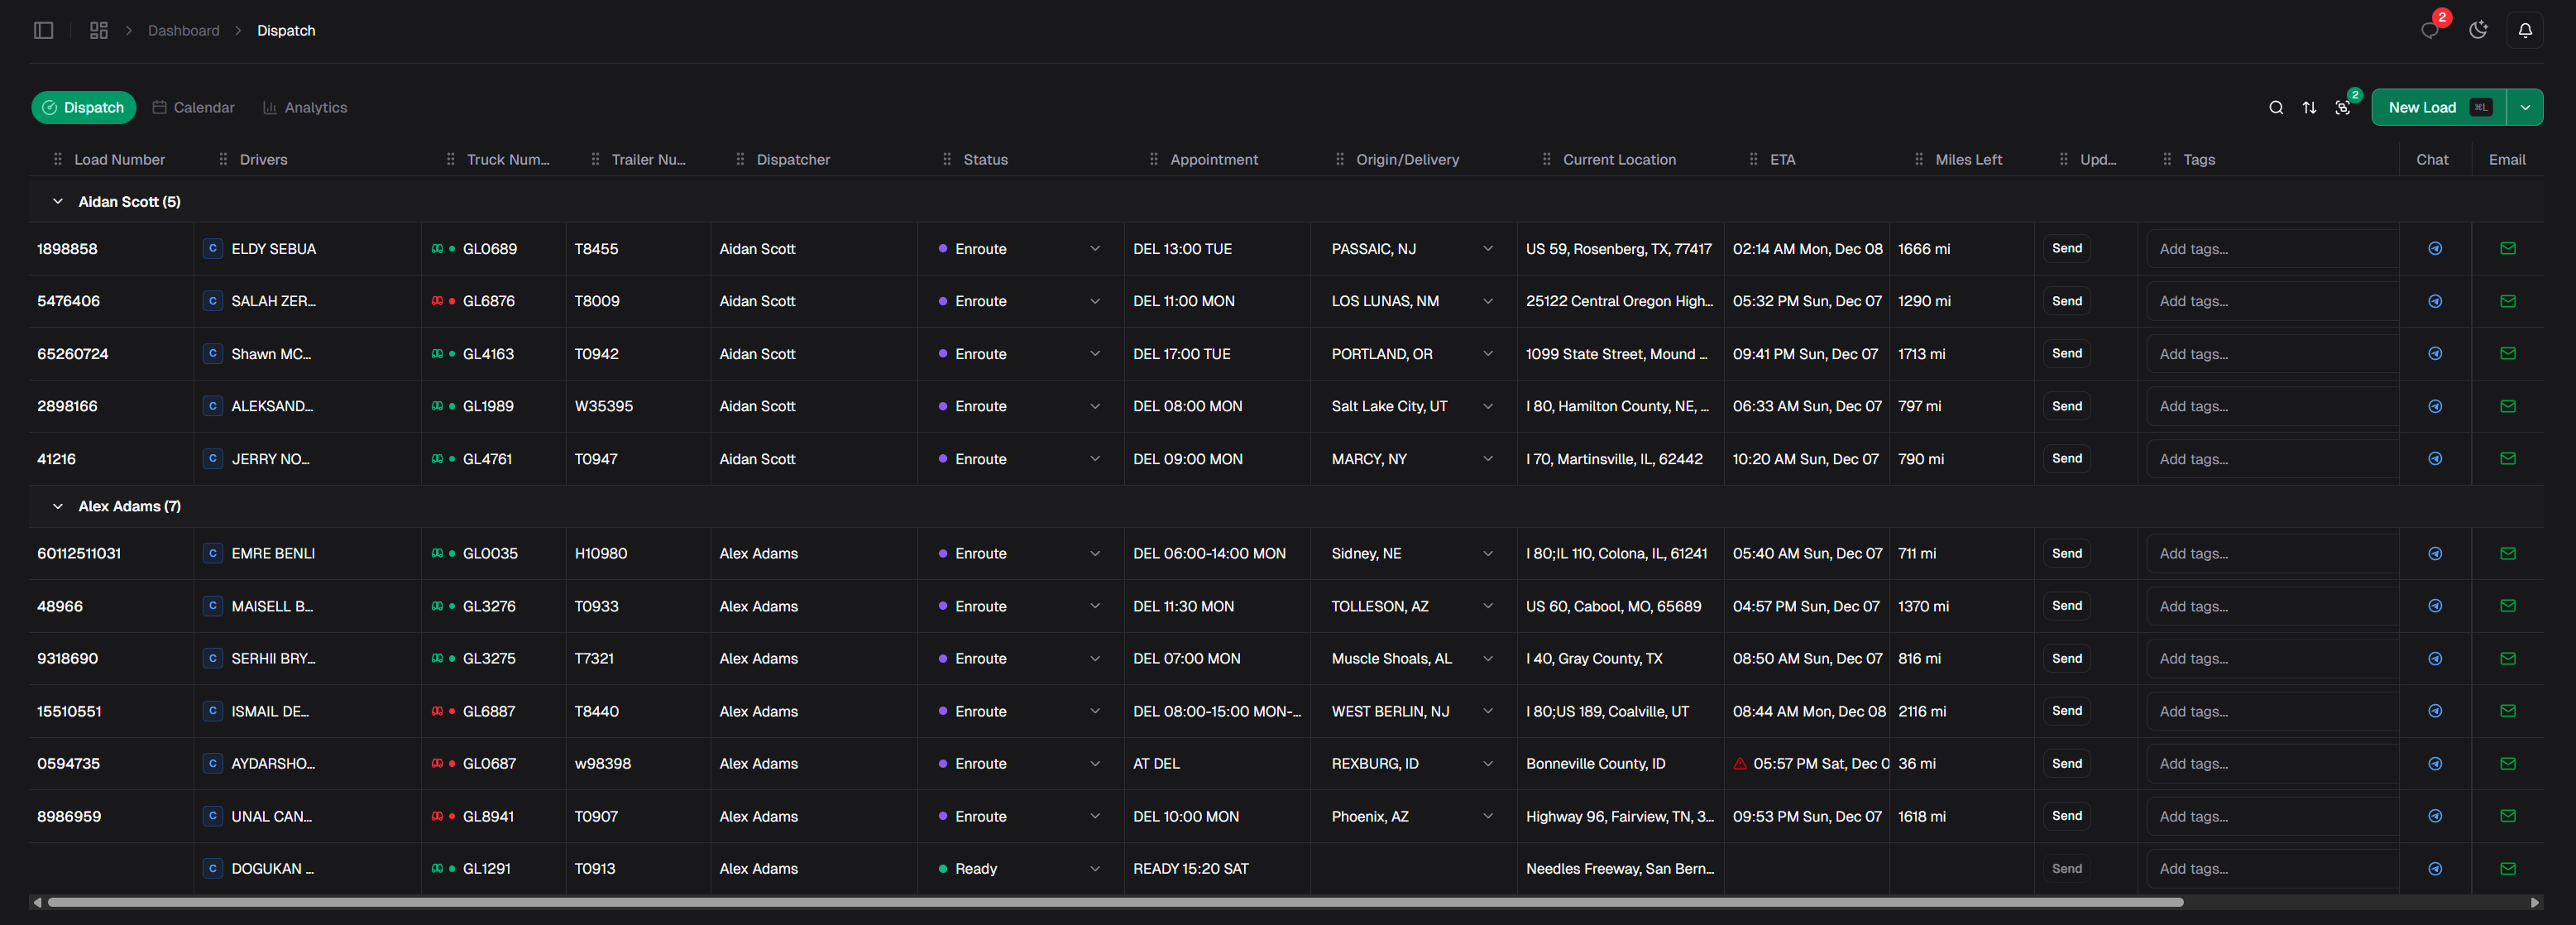
 Loads are organized with collapsible sections for each dispatcher, making it easy to focus on one dispatcher at a time:
 All loads are sorted by dispatcher but displayed in a continuous list without collapsible sections:
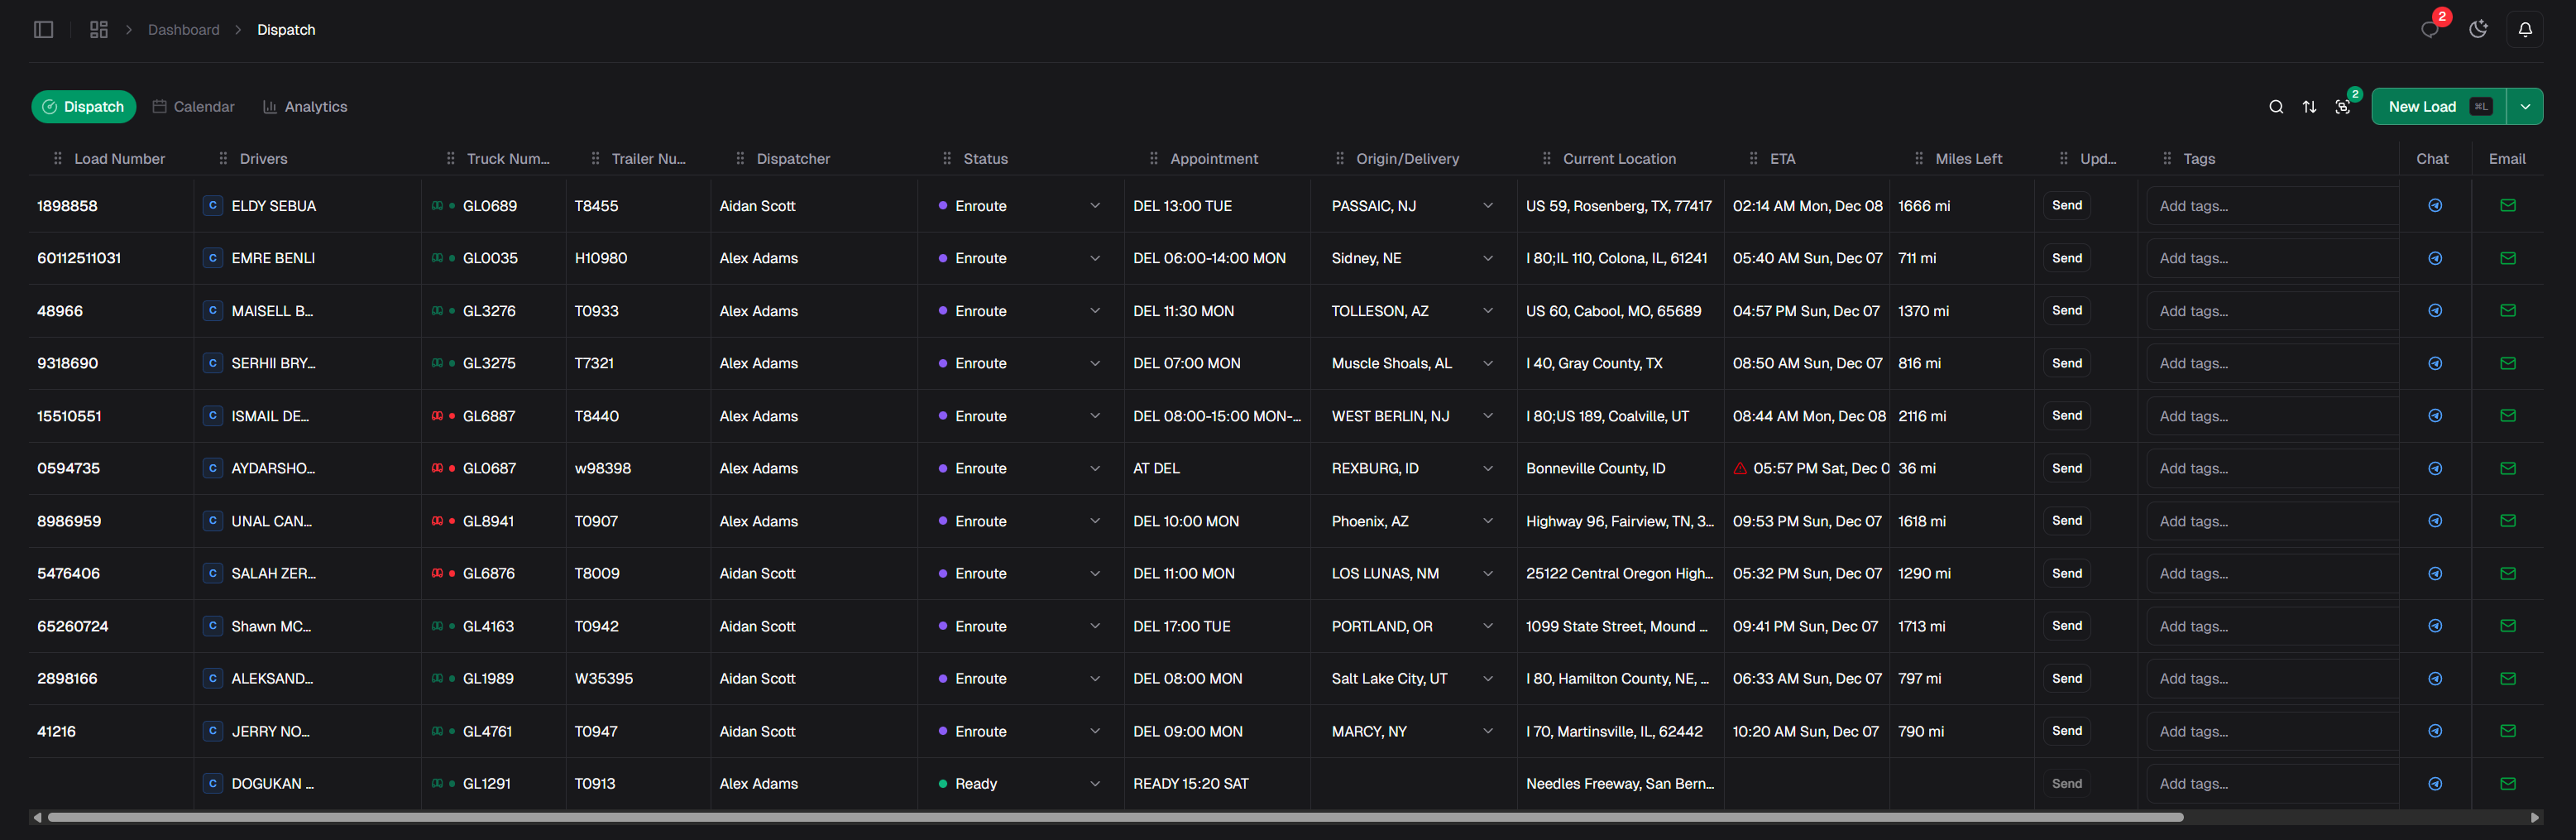 You can also apply filters and different grouping options to customize your view exactly how you need it.
Learn more about [Layout Customization](/customize/layout-customization) and [Organization](/customize/organization).
Ready to start dispatching? Create a load in seconds:
Press `Ctrl+L` (or `Cmd+L` on Mac) to open the load creation panel from anywhere.
Navigate to the Dispatch Board and click the **New Load** button:
You can also apply filters and different grouping options to customize your view exactly how you need it.
Learn more about [Layout Customization](/customize/layout-customization) and [Organization](/customize/organization).
Ready to start dispatching? Create a load in seconds:
Press `Ctrl+L` (or `Cmd+L` on Mac) to open the load creation panel from anywhere.
Navigate to the Dispatch Board and click the **New Load** button:
 The load creation form will open:
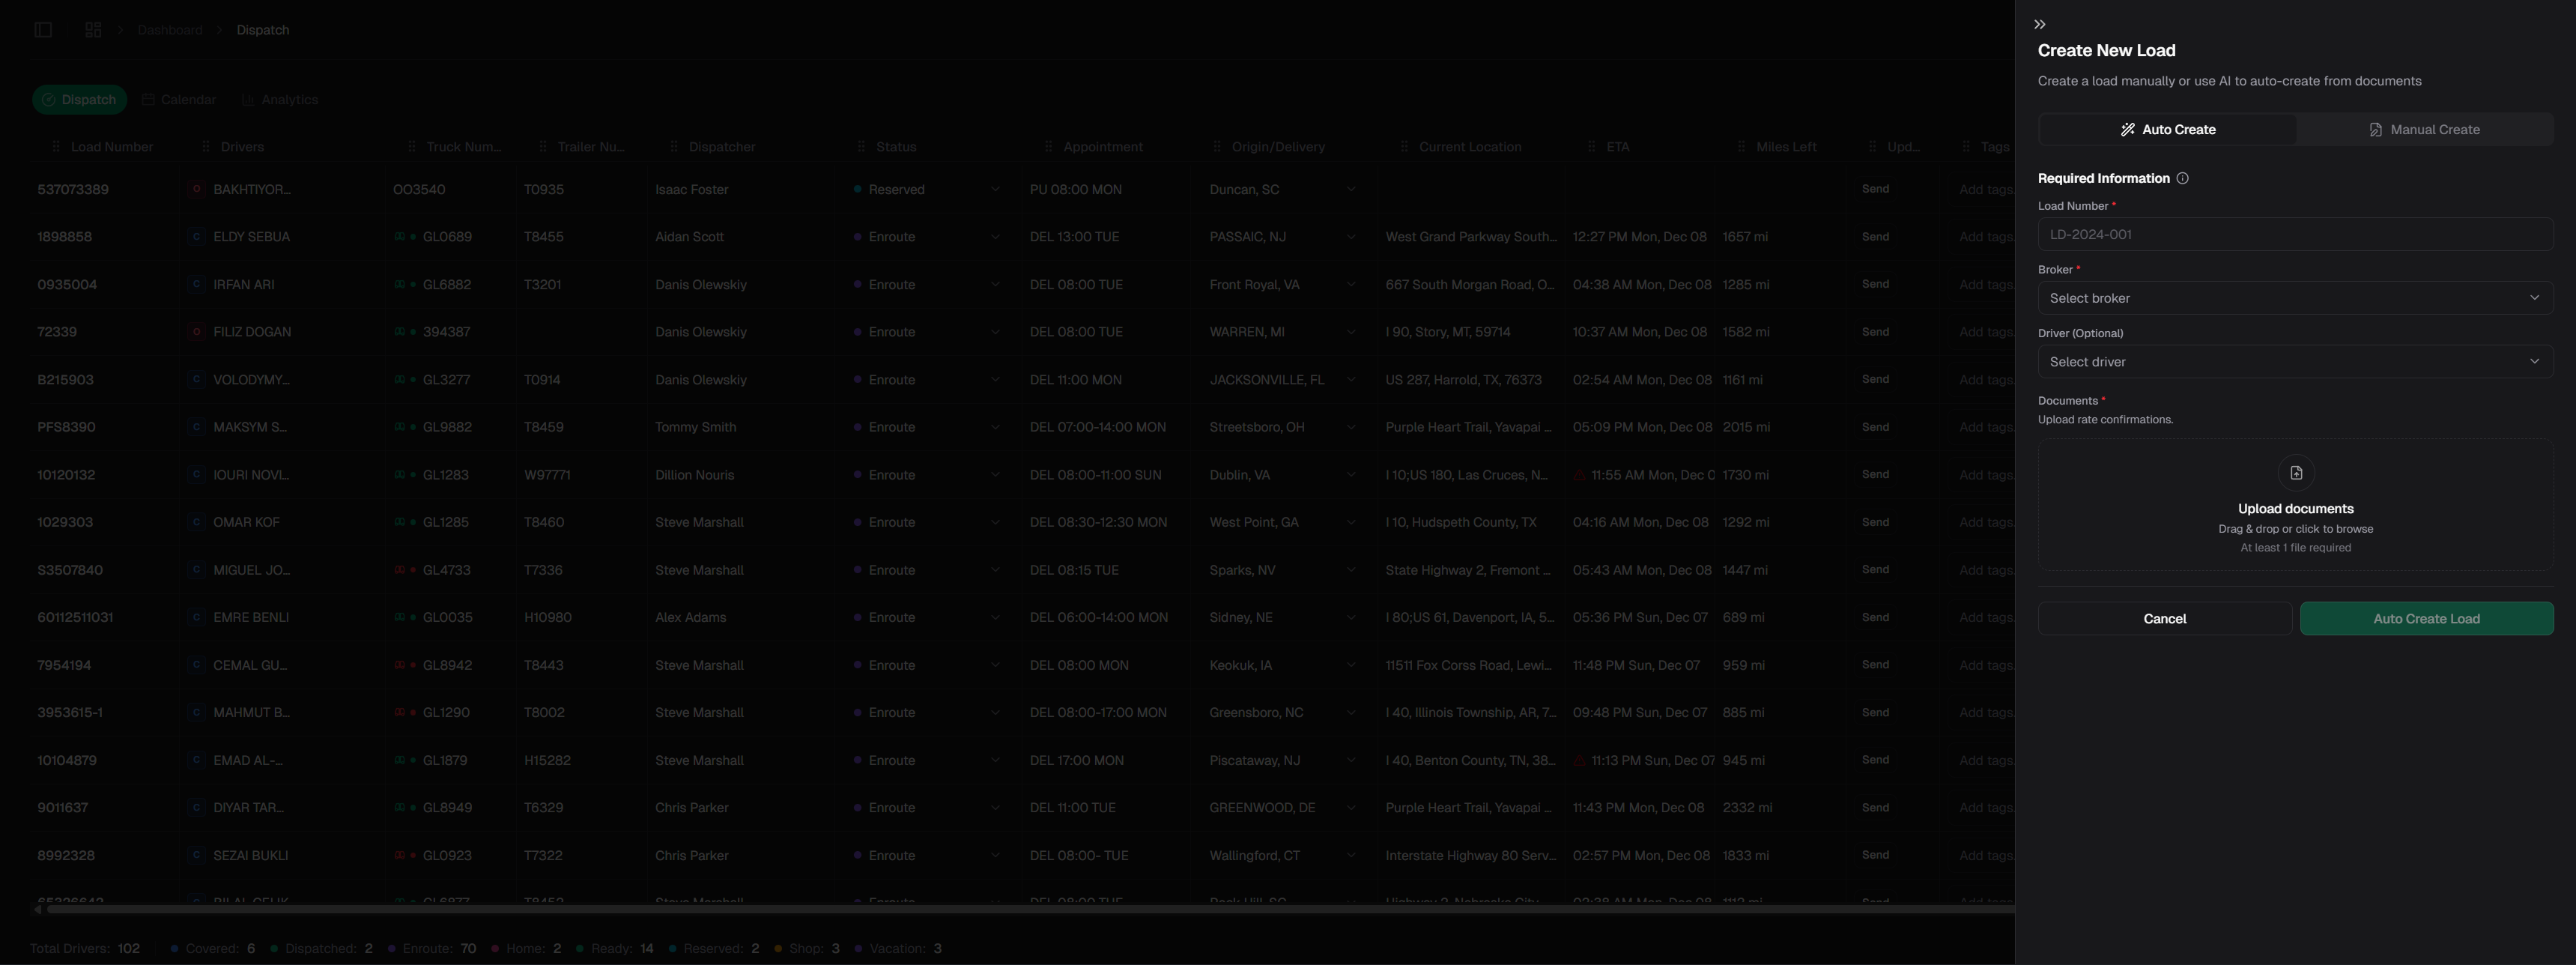 You can create loads:
* **Automatically** - AI extracts load details from rate confirmations
* **Manually** - Enter load information step by step
[Learn about Load Management](/management/load-management)
## Essential Keyboard Shortcuts
Speed up your workflow with these shortcuts:
| Shortcut | Action |
| ------------------ | ------------------------------ |
| `Ctrl+K` / `Cmd+K` | Quick search / command palette |
| `Ctrl+L` / `Cmd+L` | Create new load |
[View all keyboard shortcuts](/customize/keyboard-shortcuts)
## What's Next?
Learn how to use the Dispatch and Gross Boards
Set up your drivers, trucks, and trailers
Add and manage your broker relationships
Tailor Rooler to your workflow
## Need Help?
Contact our support team
Found a bug? Let us know
You can create loads:
* **Automatically** - AI extracts load details from rate confirmations
* **Manually** - Enter load information step by step
[Learn about Load Management](/management/load-management)
## Essential Keyboard Shortcuts
Speed up your workflow with these shortcuts:
| Shortcut | Action |
| ------------------ | ------------------------------ |
| `Ctrl+K` / `Cmd+K` | Quick search / command palette |
| `Ctrl+L` / `Cmd+L` | Create new load |
[View all keyboard shortcuts](/customize/keyboard-shortcuts)
## What's Next?
Learn how to use the Dispatch and Gross Boards
Set up your drivers, trucks, and trailers
Add and manage your broker relationships
Tailor Rooler to your workflow
## Need Help?
Contact our support team
Found a bug? Let us know